
Having everything in place not only minimizes the chances of forgetting an ingredient but also makes preparation more enjoyable.
Preparing your ingredients involves properly measuring them and laying them out on your countertop, making the process organized and efficient.
Next, preheat the oven to allow it to reach the perfect baking temperature while you prepare the batter.
This step is crucial, as starting with a hot oven helps the cake rise properly and develop a golden-brown exterior.
Greasing the pan adequately is also essential to prevent the cake from sticking, ensuring a smooth release once baked.
In a mixing bowl, start by creaming together the softened butter and sugars. This step is vital for achieving a light and airy texture in your cake.
Incorporating air into the mixture during the creaming process will prevent a dense cake and instead yield a moist and fluffy final product. Take your time with this step, allowing the mixture to become pale and fluffy.
As you incorporate the eggs, remember to add them one at a time, ensuring each is well blended before introducing the next.
This gradual addition creates a homogenous mixture that will contribute to the cake’s overall texture. When mixing in the vanilla extract and zest, do so gently to avoid deflating the mixture.
Once your wet ingredients are combined, start adding the sifted dry ingredients. The alternating method with buttermilk is essential for creating balance in moisture and structure.
Begin with the dry ingredients, mix lightly, then add buttermilk, and repeat. This technique ensures that the batter is combined without overmixing, which could lead to a tough cake.
Now it’s time to fold in your dried fruits and nuts. Gently incorporating these ingredients allows the fruits to be evenly distributed throughout the batter without damaging their shape.
The fruits will add pockets of sweetness and moisture throughout the cake, enhancing its overall flavor profile.
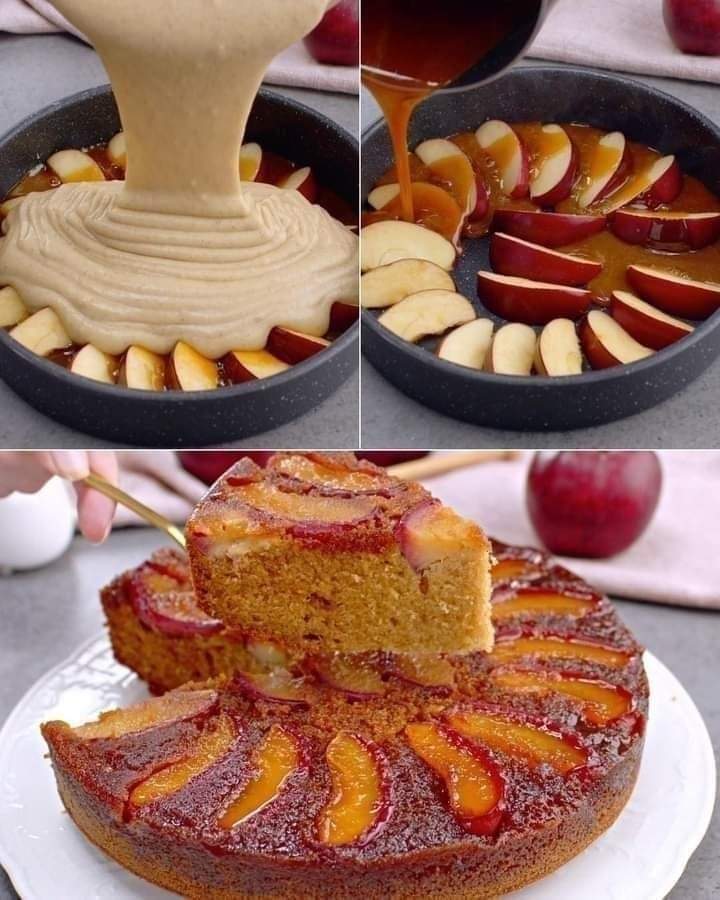
Pour the batter into the prepared pan and smooth the surface with a spatula. Pay attention to the evenness of the batter in the pan, as this will affect how evenly the cake bakes.
Finally, insert the pan into the preheated oven and set your timer for the baking time. The aroma that fills your kitchen while the cake bakes is truly enchanting.
After the baking time is completed, perform a toothpick test to ensure your cake is baked through.
A toothpick or skewer should come out clean or with just a few crumbs. Allowing the cake to cool for a short time in the pan helps it set and makes transferring easier. After cooling, enjoy the fruits of your labor.
Tips
For enhanced flavor, consider soaking the dried plums and raisins in rum or brandy for a few hours or overnight before adding them to the batter.
Select high-quality dried fruits and nuts, as their flavor will significantly impact the final taste of the cake.
If you prefer a more intense spice flavor, don’t hesitate to increase the quantities of cinnamon and nutmeg.
Ensure all ingredients are at room temperature for easier mixing and a better texture in the finished cake.
If storing the cake, wrap it tightly in plastic wrap and keep it in an airtight container at room temperature for up to a week.
For added charm, top the cooled cake with a light dusting of powdered sugar or a drizzle of glaze made from icing sugar and lemon juice.
Experiment with different nuts, such as pecans or almonds, for unique texture and flavor variations.
Conclusion
The Enchanted Plum Cake is more than just a dessert; it is a celebration of flavors that brings joy and warmth to gatherings.
Continued on the next page
ADVERTISEMENT
