
Today, I have an orchid that is in a critical condition—its roots are completely rotting, and there are almost no healthy roots left. Additionally, its leaves have begun to soften and fade, indicating severe distress. In this article, I will guide you step by step on how to care for such an orchid and revive it, even when it has only a single leaf remaining.
Step 1: Preparing the Orchid for Revival
Since the orchid is unhealthy, I begin by cutting it from its stem. This helps remove the affected parts and allows the plant to focus on growing new roots. Additionally, I cut off the larger leaf because it is too big and could drain the plant’s remaining energy. This method encourages the orchid to channel its energy into regenerating itself quickly.
Before proceeding further, I want to introduce an exciting new feature on my channel. You can now listen to my videos in English, making it easier for my international followers to understand and benefit from my content. To access this feature, simply press the settings button in the lower right corner of the video player and select the English option under the Audio Track section. Currently, only English is available, but I plan to expand this feature to multiple languages in the near future.
Step 2: Cleaning and Disinfecting the Orchid
When dealing with a diseased and rotting orchid, the first step is to thoroughly wash it with clean water. This helps remove bacteria, fungi, and any remaining decay. After washing the orchid under running water, I set it aside to dry completely. Allowing the plant to dry naturally is crucial, as excess moisture can encourage further rotting.
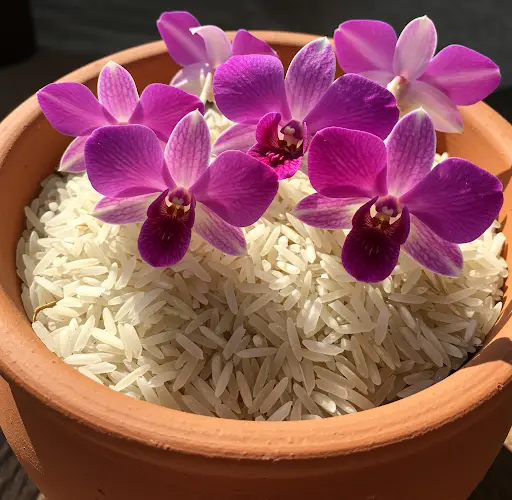
Next, I prepare a natural fertilizer to aid in the orchid’s recovery. For this, I use two tablespoons of rice, which is rich in vitamins and minerals that can facilitate root and leaf regeneration. I soak the rice in water for 30 minutes, stirring occasionally. After the soaking period, I drain the rice water, which will serve as a natural nutrient solution for the orchid.
Step 3: Applying Rice Water for Leaf and Stem Health
To disinfect and nourish the orchid’s leaves, I dip a cotton ball in the rice water and gently wipe the leaves. This process helps repair damage, making the leaves more vibrant and promoting faster growth. I carefully apply the rice water to the entire surface of the leaves to ensure maximum absorption.
Additionally, I soak the cut stem portion of the orchid in rice water for 30 minutes to disinfect it further. This step is essential in preventing bacterial infections and encouraging new root development. While the orchid is soaking, I also prepare a spray bottle filled with rice water, which I will use to mist the leaves. Spraying rice water on both the upper and lower parts of the leaves enhances nutrient absorption. However, it is important to place a small cotton ball between the leaves to prevent fungal infections caused by excess moisture.
Step 4: Setting Up the Orchid in a Rooting Environment
continued on next page
ADVERTISEMENT
