
Orchids are stunning, exotic plants—but they’re also known for being sensitive and sometimes challenging to maintain. When an orchid appears dead or severely damaged, don’t rush to throw it away. With patience, natural remedies, and proper care, even a lifeless-looking orchid can be revived and encouraged to sprout new roots and leaves.
Follow this step-by-step guide to bring your orchid back to life and stimulate healthy germination.
Step 1: Assess the Orchid’s Condition
Begin by closely examining your orchid to determine how much damage it has sustained:
-
Leaves: Yellowing, wrinkled, or missing leaves may indicate dehydration, rot, or fungal infection.
-
Roots: Healthy roots are white or green. If they appear brown, mushy, or black, they’re likely rotting.
-
Stem & Crown: Check the central growth point (the crown). If it’s still firm, there’s hope for revival. A completely mushy crown is a serious problem.
Step 2: Remove Rotten or Dead Parts
Pruning is essential to prevent further infection:
-
Use sterilized scissors or pruning shears.
-
Cut away all dead, mushy, or blackened roots.
-
Remove yellow, spotted, or rotting leaves.
-
If the stem is soft or infected, trim it back to the healthy green portion or to the base.
Step 3: Disinfect the Orchid
After trimming, disinfect to prevent future infections:
Natural Disinfection Solution:
-
Blend 1 teaspoon of ground cloves and 1 clove of garlic with 300 ml of water.
-
Strain out the solids and dilute the liquid in 2 liters of water.
-
Use a cotton ball or soft cloth to wipe down the roots and stem.
-
Optionally, soak the remaining healthy parts of the orchid in the solution for up to 30 minutes.
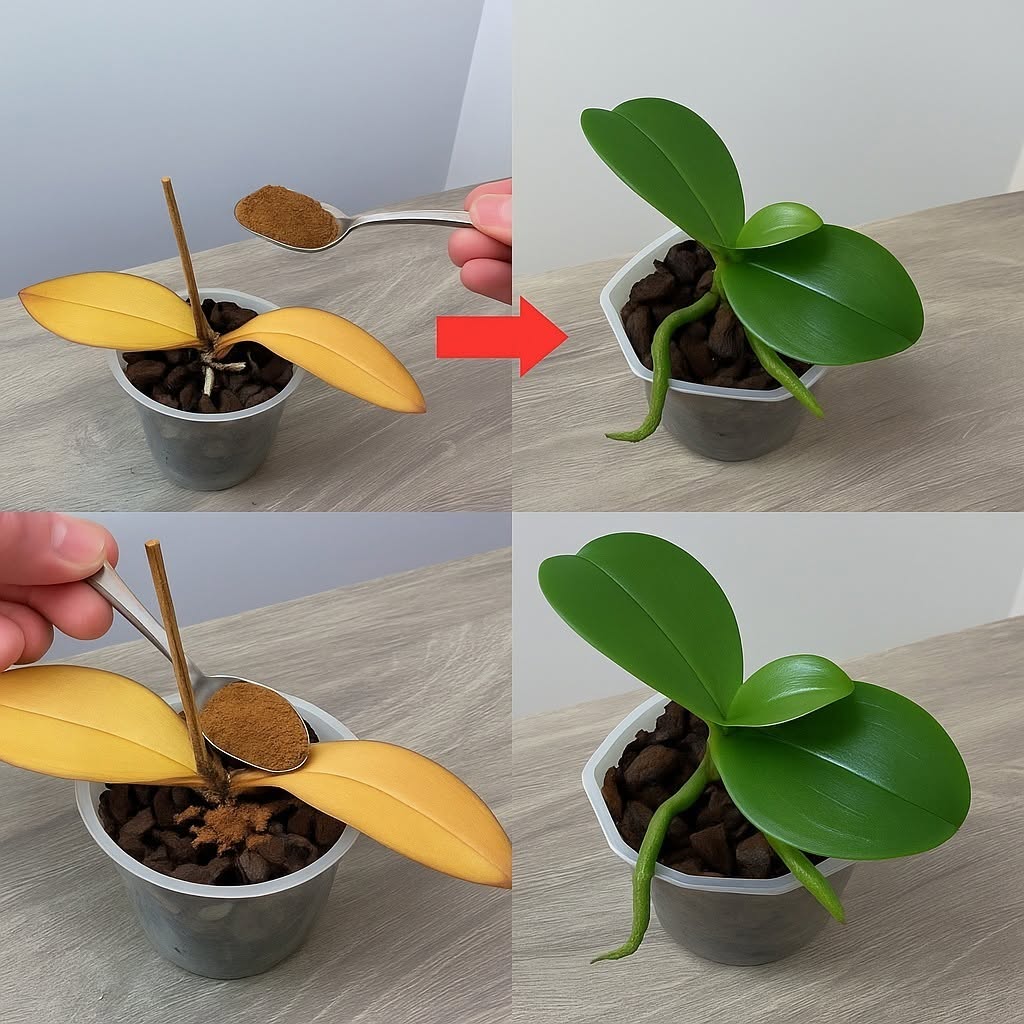
Step 4: Apply a Natural Antifungal
-
Dust all cut surfaces with cinnamon powder.
-
Cinnamon is a natural antifungal that promotes healing and protects against infection.
Step 5: Create a Humid Recovery Environment
Orchids need consistent humidity to recover:
-
Wrap the orchid stem lightly in moist cotton string.
-
Place it in a glass jar or container with a small amount of water at the bottom.
-
Make sure the cotton draws water upward to hydrate the plant—roots should not be submerged.
-
Cover the jar loosely with a clear plastic lid or wrap to trap humidity, mimicking a mini-greenhouse.
-
Keep in a bright, indirect light location, avoiding direct sunlight.
Step 6: Monitor for New Growth
Check the orchid every few days:
-
Ensure the environment is moist but not wet.
-
After 3 to 4 weeks, you should begin to see new roots or growth nodes.
-
Once you notice strong root development, the orchid is ready for transplanting.
Step 7: Transplanting the Revived Orchid
see continuation on next page
ADVERTISEMENT
